


Sprouting is another great way to optimize nutrient intake.
Sprouting activates the life process for the plant, which increases enzyme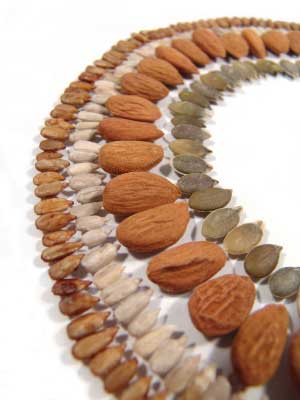 activity and makes more nutrients available.Adding sprouts to your meals creates wonderful, nutrient-rich food—and it’s inexpensive. It’s simple to enjoy fresh, delicious sprouts on a daily basis by creating your own sprout garden.
The Benefits of Sprouting
Sprouts are fiber-rich foods that serve as a great source of many vitamins and minerals. Sprouts are also an economical source of protein and beneficial fatty acids. The soaking step of the sprouting process releases enzyme inhibitors, the compounds that keep seeds in their dormant state. Many of these compounds are not useful for us, such as the tannins released from soaking many nuts like walnuts or almonds.
During the sprouting process, the macronutrients (fat, protein, and carbohydrates) are broken down into their simplest forms. The nutrient profile of the food multiplies, with especially dramatic increases in vitamin C and the B complex vitamins. In addition, in terms of energy, sprouts are lower in calories and much higher in protein than the seeds from which they came.
Sprouting
You can sprout using one of several time-tested methods: Jar The jar method involves sprouting in a mason jar with a mesh top. You rinse the seeds in the jar daily and let it sit at a 45-degree angle until the seeds are ready for harvest. Sprouting bags With this method, you replace the jar with a linen or cotton mesh sprouting bag. The seeds are soaked, rinsed, and sprouted inside the bag. Tray Trays are used to grow wheatgrass, barley grass, sunflower greens, and buckwheat greens. Here, you plant the seeds in approximately 11/2 inches of potting soil. Many sprouters feel this makes the perfect indoor garden.
Clay saucers Clay saucers of different shapes and sizes create a beautiful sprouting garden. Try this method with gelatinous seeds such as flax, psyllium, and chia seeds. Spread the soaked seeds on the clay saucer. The saucer is placed in a bowl of water which keeps the clay moist, which in turn keeps the seeds moist. Cover the items with a mesh screen while they’re sprouting.
We recommend you start with the simple jar method before you move on to the others. Here’s a checklist of what you need to get started with the jar method:
- Organic seeds, nuts, grains, and legumes (More on this in a bit.)
- 1-quart or larger wide-mouthed mason jars
- Mesh top for the jar (This allows water and air to circulate. You can use any mesh bag or screen, fixed with a rubber band. You can also get prefitted lids that have a screen and are made specifically for sprouting.)
- Dish rack or other setup to hold jars at an angle to allow for drainage
With these simple tools, you can begin your sprouting journey. Check out your local health food stores and the raw websites listed in Appendix B to purchase the essentials. And be sure to experiment with all the different methods until you’re an adept sprout gardener. It’s really much easier than it seems after you work out some of the details.
The Miracle of Sprouting
In nature, seeds remain dormant until the temperature and conditions are favorable to begin the growing process. When you soak them in water, you’re creating those conditions yourself. It’s a wonder to behold dormant seeds sprouting into vibrant plants that nourish and sustain you.
Before beginning, select a good location to set up your indoor garden. Space in a dish rack with no direct sunlight is an ideal location to start. When you get used to this method, you can time each cycle for a continuous supply. Some sprouters start a new batch while harvesting the first one.
First Comes Germination
The first step in the sprouting process is to select and measure the seeds, nuts, grains, or beans you want to sprout. Sift through them to remove any dirt, pieces of stone, or any other foreign matter. Rinse them well and add them to the sprouting jar. Nearly fill the jar with water, cover with the mesh lid, and leave the seeds to soak.
Be sure to use organic seeds that are as fresh as possible and filtered water. For maximum nutrition, store your seeds in glass jars in a cool, dark place until you’re ready to use them. Seeds can last for a few years, and even longer if they’re refrigerated or
frozen.
From Seed to Sprout
After the seeds have soaked for the allotted time, they’re ready for the next stage in their continuing evolution. As your seeds begin to germinate, rinse them with fresh water 2 to 4 times a day and allow them to drain thoroughly. Rinsing and draining takes place while the sprouts are still in the jar. Place on a 45-degree angle after each rinse. The number of rinses depends on the sprouts and the temperature and humidity of the location where you are sprouting. Warmer, more humid environments require more rinsing. Proper drainage is essential or the sprouts will begin to rot.
Within a couple days, seeds expand and tiny sprouts form. Allow the sprouts to grow at room temperature for 2 to 7 days, depending on the sprouts, and witness the miracle of life as the sprouts continue to grow until they’re ready for harvest.
Harvest Time and Beyond
While the sprouts are evolving, keep them out of direct sunlight to avoid cooking them. But just before harvesting them, place them in full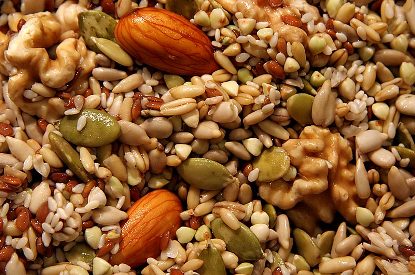 sun for around 15 minutes. Sunlight activates the chlorophyll in the plant. When the sprouts just begin to turn green, this means the chlorophyll is just becoming present and the sprouts are ready to be harvested. Grains, legumes such as garbanzo beans, and nuts such as almonds will not form a green sprout. They are ready for harvest when a small tail about the size of the seed forms. To harvest, remove sprouts from the jar, place in a colander, and gently rinse and drain well. Smaller seeds like alfalfa and clover have tiny husks and ungerminated seeds mixed in with the sprouts. The best method to harvest these sprouts is to pour them into a large bowl of water and allow them to soak. Break up the sprouts, gently skim off the husks floating on top, and remove the sprouts without touching the ungerminated seeds at the bottom. Be sure to drain well before refrigerating. Store harvested sprouts in the refrigerator in a glass container with a slightly moist paper towel inside. Be sure they’re well drained, and depending on the sprout, rinse daily to preserve freshness. Many sprouts last for up to a week if stored properly.
What to Sprout?
Although we give a list of many great seeds to sprout, we’d like to highlight some here. Our favorites to sprout include seeds such as alfalfa, broccoli, clover, sunflower, radish, mustard, and fenugreek; legumes like mung, lentils, and garbanzo; grains like wheat, spelt, kamut, and rye; and our favorite nut is almond, sprouted just until a tiny sprout appears, sometimes in just 2 days. Some seeds and nuts are soaked and rinsed but not sprouted. We soak walnuts, pecans, hazelnuts, and Brazil nuts at room temperature from 4 hours to overnight. Soak seeds such as sesame, pumpkin, and hulled sunflower for at least 1 to 4 hours and rinse thoroughly before using. Nuts such as macadamia nuts, pine nuts, and cashews only need to soak for 1 or 2 hours. In warmer climates, if you soak nuts or seeds for more than 6 hours to overnight, you may want to do so in the fridge. Some sprouts of tomato seeds are toxic and should be avoided. Buckwheat greens should not be eaten in extremely large quantities. Kidney bean sprouts contain a toxin and should be avoided. The key is to rinse sprouts well, whether home grown or store bought, to reduce the chance of the spread of bacteria.
The Wonder of Sunflower Seed Sprouts
We’d like to take a moment to highlight one of our favorite sprouts and salad greens derived from the tiny sunflower seed. Sunflower seed sprouts add a delicious, nutty crunch to salads. They’re also wonderful in live hand rolls and excellent when blended into smoothies.
Sunflower greens and sprouts are high in protein and vitamins A, D, E, and B complex. They’re a good source of minerals, including calcium, magnesium, copper, iron, potassium, phosphorus, and zinc. For sunflower seed sprouts, soak the hulled seeds and sprout for 2 days using the jar method. A small sprout will form. Rinse the sprouts well, and sprinkle them on salads or blend them in smoothies for a delicious nutty flavor.
To grow your own sunflower greens, use unhulled seeds. You can use the jar method for small amounts, but for larger batches, use the tray method. Be sure you have a tray with good drainage, and fill it with approximately 1 inch of soil. You can use potting soil and consider soil enhancers like kelp powder. Place the seeds in the soil, keeping them out of direct sunlight by covering them with a paper towel, and keep the soil moist until the seeds push up. Water regularly, allowing for proper drainage. The greens will be ready for harvest in about a week. Before harvesting, place the tray in direct sunlight for 15 minutes to activate the chlorophyll. Cut with scissors or a sharp knife when approximately 5 inches high.
In Search of Greener Grasses
Wheatgrass has long been purported to provide health benefits, from supplementing the diet with vital nutrients to possessing medicinal qualities. However, its true health benefits are yet unknown. Wheatgrass is a good source of many important vitamins, minerals, and phytonutrients. Wheatgrass juice is great on its own or added to other green juices. It does have a strong flavor that may require getting used to, but do give it a chance.
To grow wheatgrass, soak 1 cup wheat berries in water for 12 hours and then discard any broken seeds. Drain and refill with water for 1 more day. Leave to drain for 2 days, rinsing daily until small sprouts appear. Plant the wheat berries in a drainable tray with about 11/2 inches soil and peat moss. Cover with a small amount of soil. Keep in indirect sunlight for about a week or until grass is 4 to 6 inches high. Keep the soil moist but not too wet. Some people set the wheatgrass in full sunlight for some of the time as it approaches harvest, but if you do this, be careful to avoid burning the new growth.
Harvest with a pair of scissors. Depending on the soil quality, it’s possible to grow a second and even a third harvest from the same berries. Juice and drink as soon as possible after harvesting. Barley grass is another popular grass with nutritional benefits similar to wheatgrass. Both are purported to be high-power tonics that impart energy and demonstrate the true meaning of living foods.
The Least You Need to Know
- Soaking and sprouting activates the process of germination, which increases the food’s nutrient profile.
- It’s easy to set up an indoor sprout garden to grow your own sprouted seeds, nuts, grains, and legumes.
- Sprouts provide a burst of flavor and high-powered nutrition to salads, sandwiches, casseroles, drinks, or any meal.
- Wheatgrass and barley grass are superfoods and tonics that may contribute to optimal health.
When in doubt soak! When you can Sprout! You don't need expensive equipment either, jam jars and muslim can work. To soak you need only water - just make sure its good water! Enhance what you already eat by soaking it first! Any chance you have to give your body a rest take it! Always go for more goodness and less stress. Steer clear from empty calories and go for ones that are packed with goodness and really count!
![]()
Disclaimer: This website is for information purposes only. By providing the information contained herein we are not diagnosing, treating, curing, mitigating, or preventing any type of disease or medical condition. Before beginning any type of natural, integrative or conventional treatment regime, it is advisible to seek the advice of a licensed healthcare professional.


